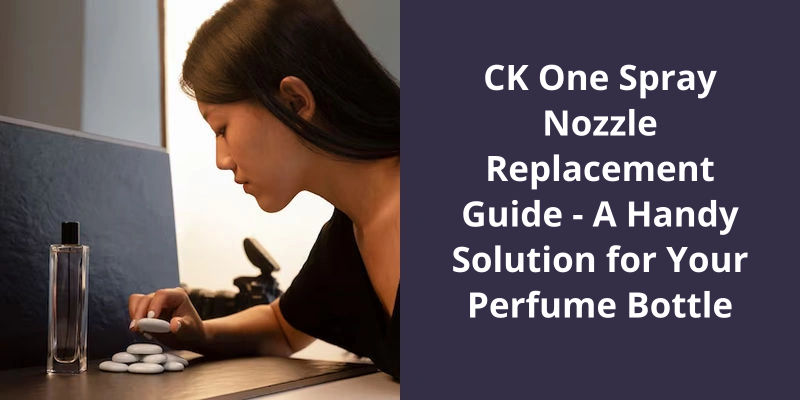
The iconic fragrance of ck one has been a staple in the world of perfumes since it’s introduction in 1994. The fresh and youthful scent has captured the hearts of many, becoming a popular choice for both men and women. Despite it’s universal appeal, even the best fragrances are bound to run out eventually. But rather than discarding the entire bottle of ck one, a quick and simple solution is to replace the spray nozzle. With a replacement part, spraying the refreshing scent is as easy as it was when you first opened it. In this article, we delve into everything you need to know about ck one spray nozzle replacements, from factors to consider when selecting one to how to install it properly.
How Do You Unblock a Spray Nozzle?
If you don’t have mineral spirits or paint thinner on hand, you can also try soaking the nozzle in hot water with dish soap added. This method may take a bit longer than using a solvent, but the heat and soap can help break down the clogs for removal.
Another option is to hold the nozzle under hot running water and use a toothbrush or small brush to scrub away any dried or stuck paint. Be sure to scrub the nozzle from different angles to ensure all parts are properly cleaned. You can also try using compressed air to blow out any remaining debris.
If none of these methods work to unblock the nozzle, it may be time to replace it altogether. Nozzles can become damaged over time or through use of harsh chemicals, so it’s important to regularly clean and maintain them to ensure proper functionality.
To prevent future clogs, avoid leaving paint or other materials to dry in the nozzle. After each use, run clean water through the nozzle and wipe away any excess paint or debris. Additionally, store the nozzle upright to prevent any residual liquids from settling at the bottom and causing blockages.
Overall, unblocking a spray nozzle requires patience and attention to detail. By taking the time to properly clean and maintain your nozzle, you can ensure long-lasting use and a smooth spraying experience.
Tips for Maintaining Your Spray Nozzle
To maintain your spray nozzle, make sure you clean it after each use by flushing it with water or a cleaning solution. Avoid using harsh chemicals that could damage the nozzle. Use a soft-bristled brush to remove any buildup or debris on the nozzle. Store your nozzle in a cool, dry place to prevent damage or corrosion.
Whether you’re cleaning your windows, misting your plants, or freshening up a room with a DIY air freshener, a spray bottle is an essential tool in your cleaning arsenal. But what happens when your trusty spray nozzle fails to deliver the fine mist that you need? Don’t throw away that bottle just yet! With a few simple tips and tricks, you can fix a clogged spray nozzle and enjoy all the benefits of your favorite cleaning products once again.
How Do You Fix a Spray Nozzle That Won’t Spray?
One of the most frustrating things about using a spray bottle is when the nozzle won’t spray. Whether youre trying to clean a surface, water a plant, or apply a solution, a clogged spray nozzle can really slow you down. Fortunately, there are some simple steps you can take to get your spray bottle working again. The first thing to try is using warm water to clear the nozzle.
To use this method, start by removing the top of the spray bottle and placing the tubing (with the nozzle still attached) in a cup of hot water. Then, pump the spray top until water sprays out with ease. This should help to clear any clogs or debris that may be preventing the nozzle from spraying.
Gently insert the needle or pin into the hole on the top of the nozzle and wiggle it around to clear any clogs. Be careful not to push too hard, as you could damage the nozzle or tubing.
Another potential cause of a spray nozzle not spraying is a clog in the tubing itself. To check for this, remove the tubing from the spray bottle and blow air through it to see if it’s clear. If it’s not, you may need to use a pipe cleaner or small brush to clear out any debris.
If none of these methods work, you may need to replace the spray nozzle or tubing altogether. You can typically find replacement parts at hardware or home improvement stores, or online. Be sure to check the manufacturers instructions to ensure that youre using the correct replacement parts.
A spray nozzle that won’t spray can be a frustrating problem, but it’s usually fixable. With a little patience and persistence, youll be back to cleaning, watering, and applying solutions with ease.
Tips for Preventing Clogged Spray Nozzles in the First Place
Here are some tips to prevent clogged spray nozzles:
1. Ensure that the nozzle is properly cleaned after each use
2. Use a filter on the sprayer
3. Store the sprayer in a clean and dry place
4. Use distilled water instead of tap water
5. Remove any debris from the solution before spraying
6. Avoid using abrasive chemicals.
Source: How to Unclog a Spray Bottle and Aerosol Can – Martha Stewart
Watch this video on YouTube:
Now, that you know how to repair a jammed nozzle on a perfume bottle, let’s delve into some other common problems that can arise with cologne bottles and how to address them. After all, a malfunctioning nozzle can easily put a damper on your signature scent. But don’t worry, with a little know-how and patience you can get your cologne bottle working like new in no time.
How Do You Fix a Cologne Nozzle?
As much as we try to avoid it, accidents happen. Sometimes, the nozzle on our favorite cologne bottle can get jammed or stuck. This can be a frustrating experience, but don’t worry – it can be fixed! With a needle and a steady hand, you can easily fix a cologne nozzle.
The first step in fixing a jammed cologne nozzle is to locate the tube within the bottle. This tube sits inside the bottle and is responsible for drawing the liquid up through the nozzle when the bottle is sprayed. Gently pull the tube out of the bottle so that the metal ball at the end is exposed.
Next, take a sewing needle and carefully insert it into the opening of the nozzle. You want to adjust the metal ball that’s stuck in the spring, and the needle should help you with that. Be sure to use a steady hand and a gentle touch to avoid damaging the metal ball or the spring.
Now that youve adjusted the ball and freed it from the spring, it’s time to reinsert the tube into the bottle. Using your hands, gently put the tube back into the opening, making sure that the metal ball is aligned correctly with the spring. Be sure to push the tube all the way down into the bottle.
Finally, test the nozzle to see if it’s been fixed. Give the bottle a few gentle sprays and see if the liquid comes out smoothly. If not, you may need to repeat the process and make some more adjustments.
Conclusion
While it may seem like a small component, a faulty spray nozzle can result in product waste, diminished user experience, and even damage to the environment. Therefore, it’s vital to invest in high-quality replacement nozzles that are designed to work seamlessly with the ck one products. By selecting the proper replacement nozzle, users can optimize their product usage, reduce their environmental impact, and save money in the long run.